
Thursday, 24 March 2016
Wednesday, 16 September 2015
Drawing Journey Part25 - Rose
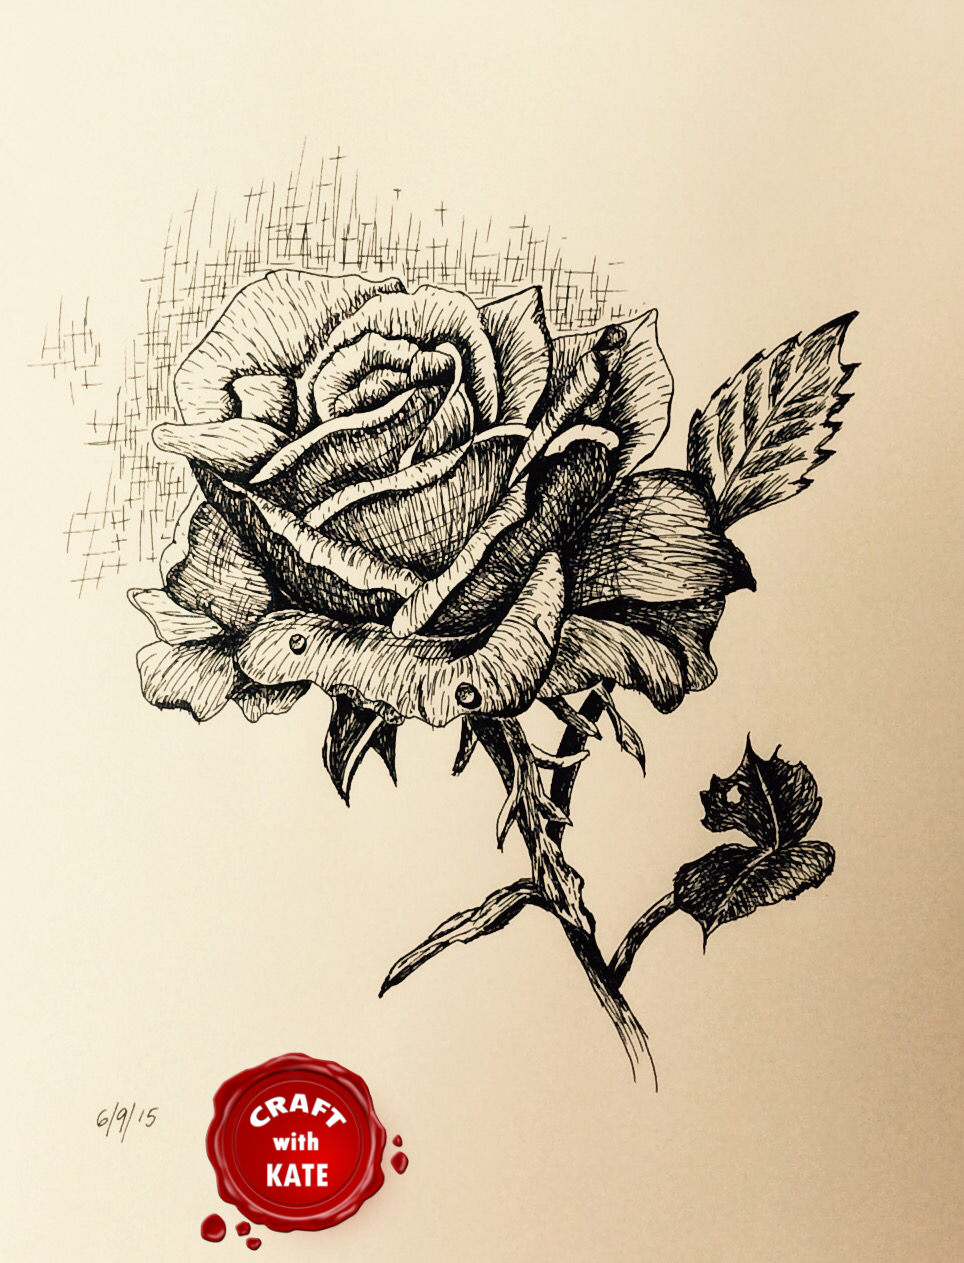
So, after a few days of having fun with some simple hatching and crosshatching I decided to do some funky project.
I found a Rose tutorial made by PaintBasket on YouTube which I thought it would be a great way to test my new skills. Link to it is HERE
I
wanted to begin with the very same starting point as a gentleman on
video, so I paused the video, took a screenshot of the outline he did,
resized it a A5 (European size) , did a transfer and I got my 0.35mm
technical pen ready.
I
started to watch the video and I can confidently say that I had not
seen nothing more boring than that. It was long, dragging and despite
the gentleman's soothing voice it was also incredible monotonous. As
it was in a real time it took about 1 hour and 45 minutes of
suffering. He was really trying to explain his thinking process as well
which was nice but did not help me that much so in the middle I decided
to just go with it with some faith and hoping for the best. I replicated
shadows he did. I replicated the highlights he did. I replicated some
strokes he did and so on without thinking why.
When
I was done something magical happened. As I was so focusing constantly
on very small portion of the drawing I completely missed it as a whole.
Then I looked at it from bigger distance and I could see my Rose looking
like a professional artwork.
Lesson
learned! Give a chance to something even though you think is pointless
because magic happens at the very end. I am very grateful for this not
"boring anymore" tutorial because without it I wouldn't be able to ink
the Rose and my artistic confidence wouldn't improve.
I am so incredible exciting and pleased with the result that I can't wait for my next projects.
Artist to Artist note :
When you do the same as me please don't claim it as your own, instead give the credit to the person you've got it from.
Saturday, 12 September 2015
Drawing Journey Part24 - Beginning of Inking
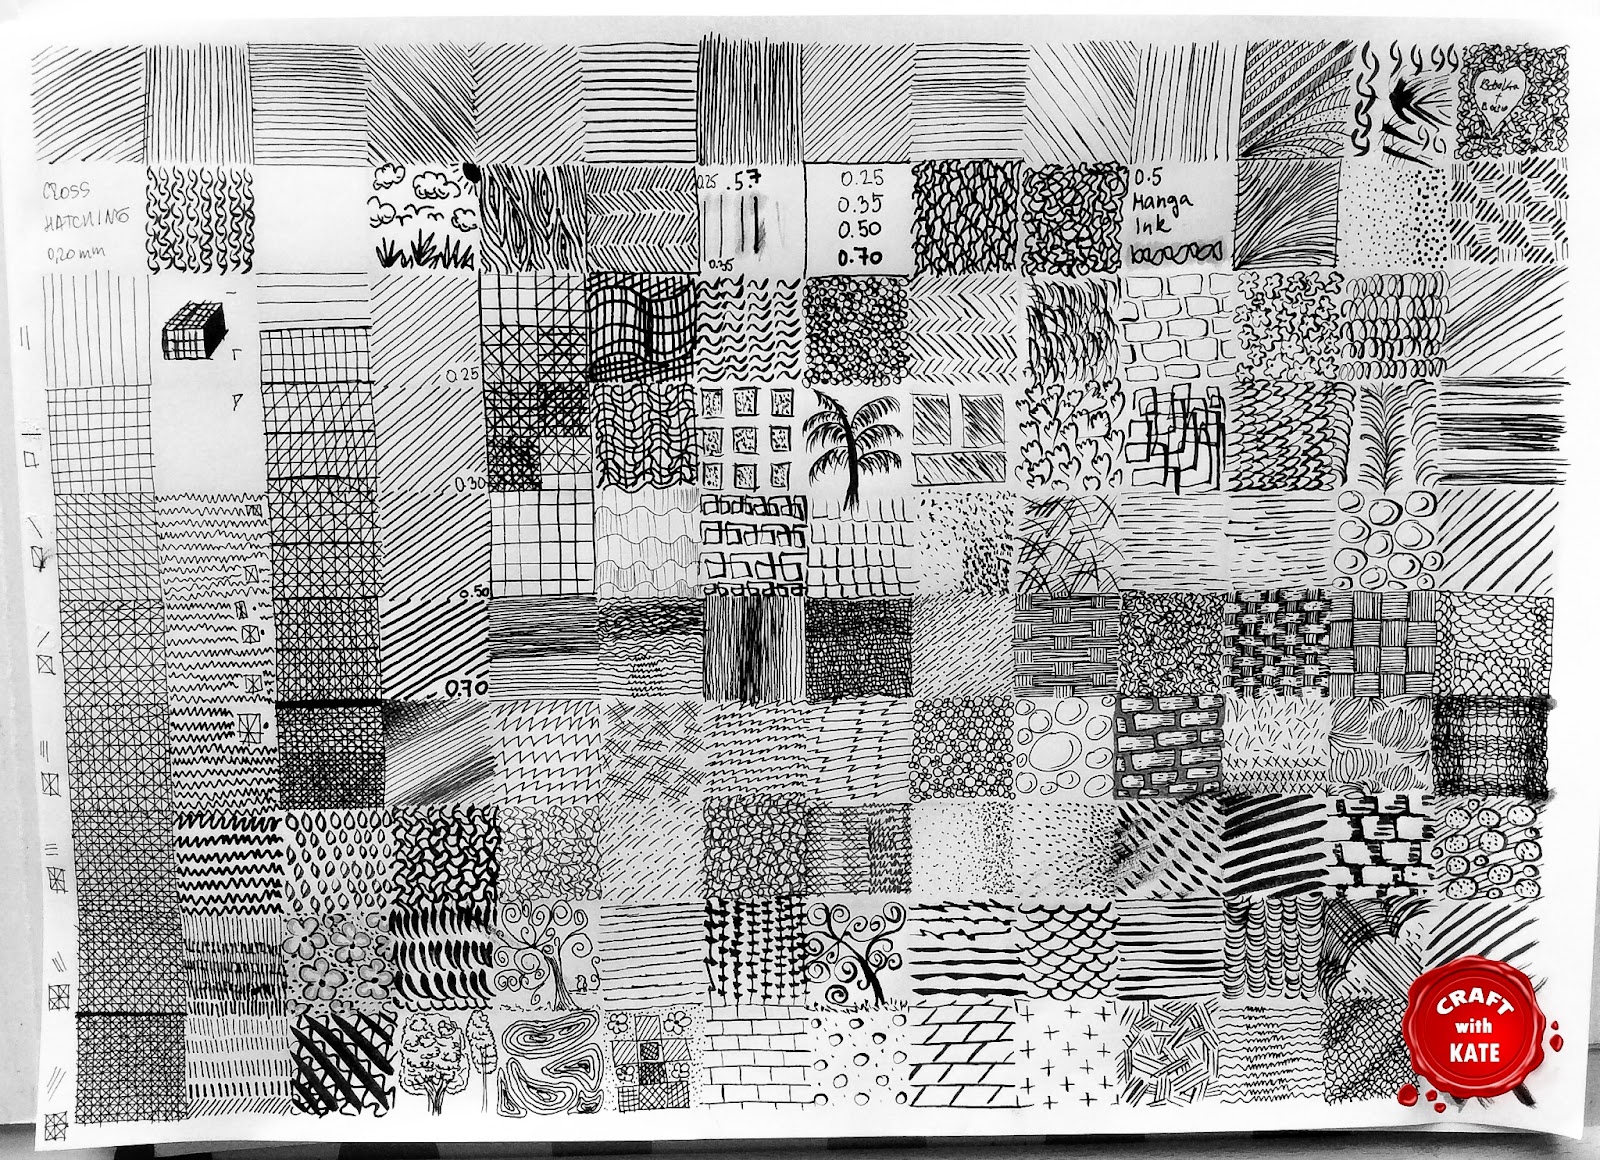
I fell in love with inking instantaneously and I bought a set of Faber-Castell set of technical pens as well. It was something incredible satisfying to see wet ink drying out on the paper that I could do just simple hatching and crosshatching for hours and hours.
Was a little bit surprised that there are not as many resources nowadays as I thought it would be about using technical pens and all books I bought were dated back to the 80s. I guess it's not "trendy" anymore as it used to be :)
Anyway, my next project is to ink a rose so fingers crossed it will turn up at least good, aiming for great :)
Have a great artistic day
Wednesday, 9 September 2015
Drawing Journey Part23 - Jug
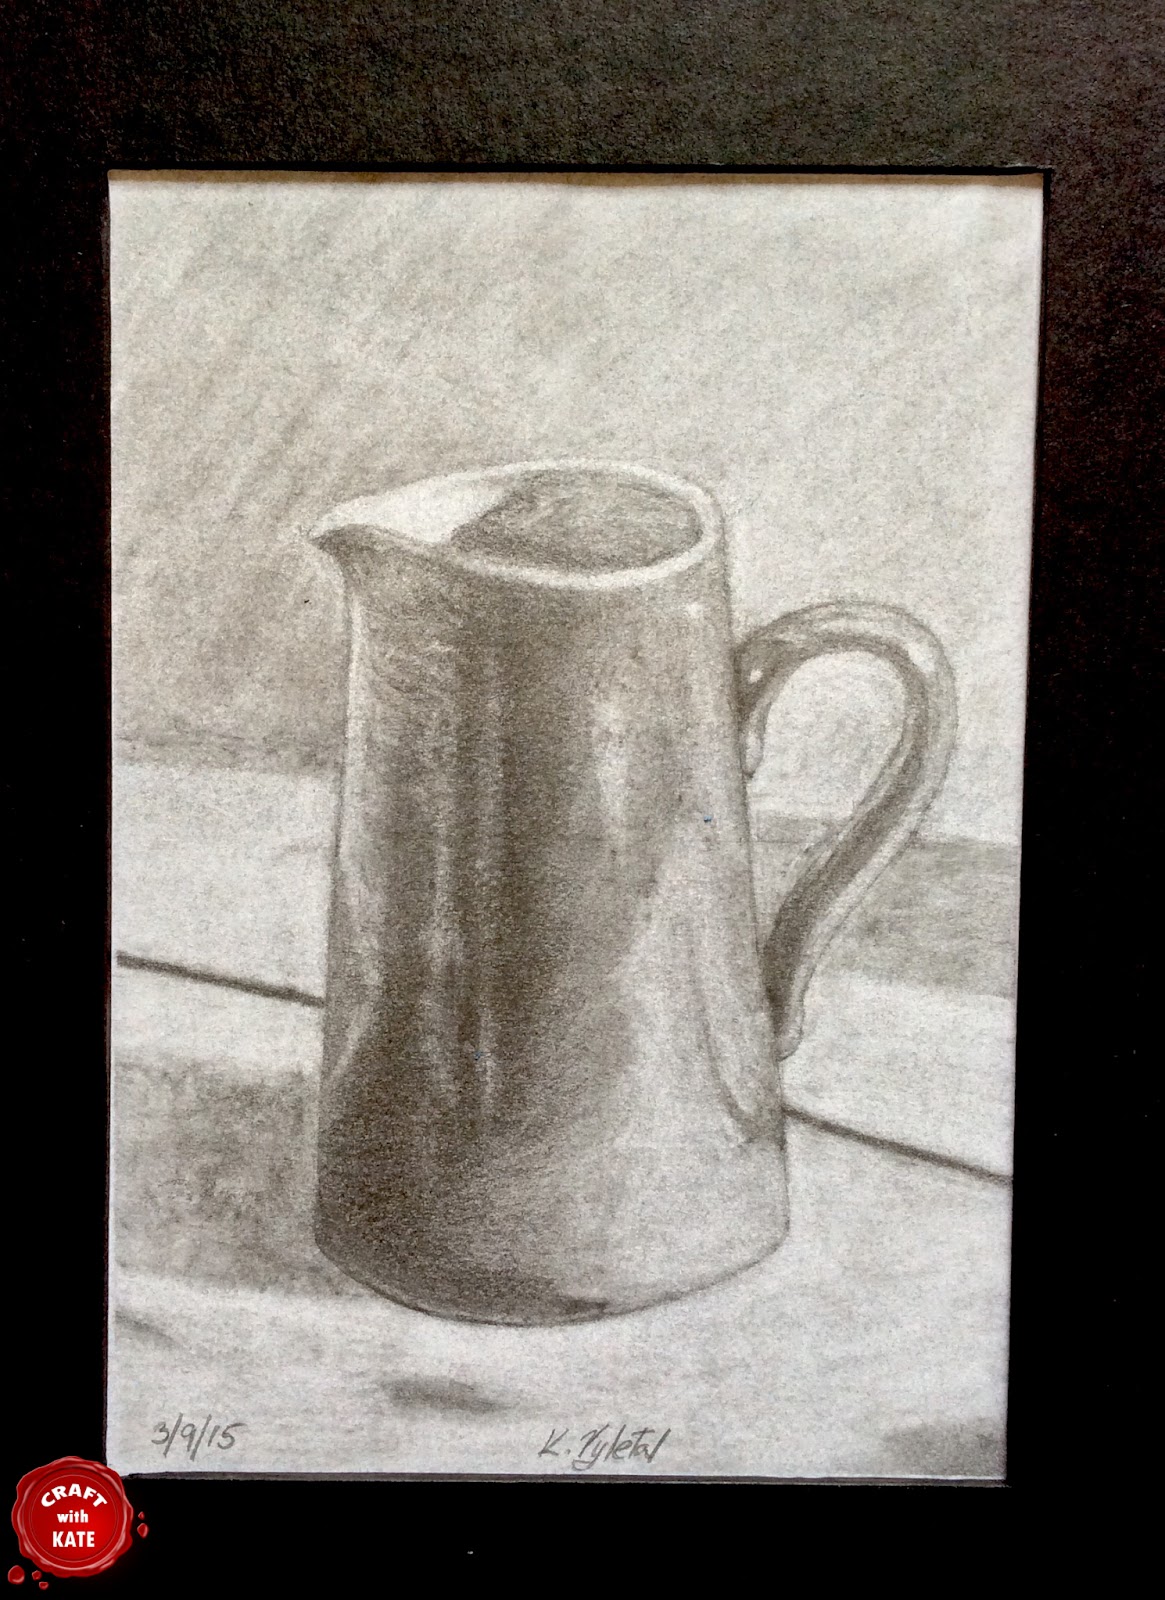
This exercise was far the best one yet!
At the beginning I had to prepare a tonal ground
for my drawing which just meant starting to draw on grey surface instead if white one. Later on I discovered it was more about erasing than
using a pencil and I truly loved it.
To make a tonal ground I sprinkled graphite shavings onto the
paper and then smudged them to create a smooth middle grey/natural grey
tone. A clutch pencils are brilliant for making graphite dust as there
is no wood from pencil shaft to contaminate it.
When that was done I started with rough sketch of a
jug which could be found on Will Kemp website or click HERE. He used a
picture of pomegranate in his course however I liked the jug better.
Then I was adding shadows with soft pencil where it was need and for highlights I used an eraser.
Because I started with already mid-tones placed on
the paper I found it very easy to either go darker for shadows or
lighter for highlights using the eraser opposite to drawing and shading from the scratch on
white card.
Hope you like it as much as I do :)
See you next time and have a great Day
Thursday, 3 September 2015
Drawing Journey Part22 - Upside-Down-Puzzle 2

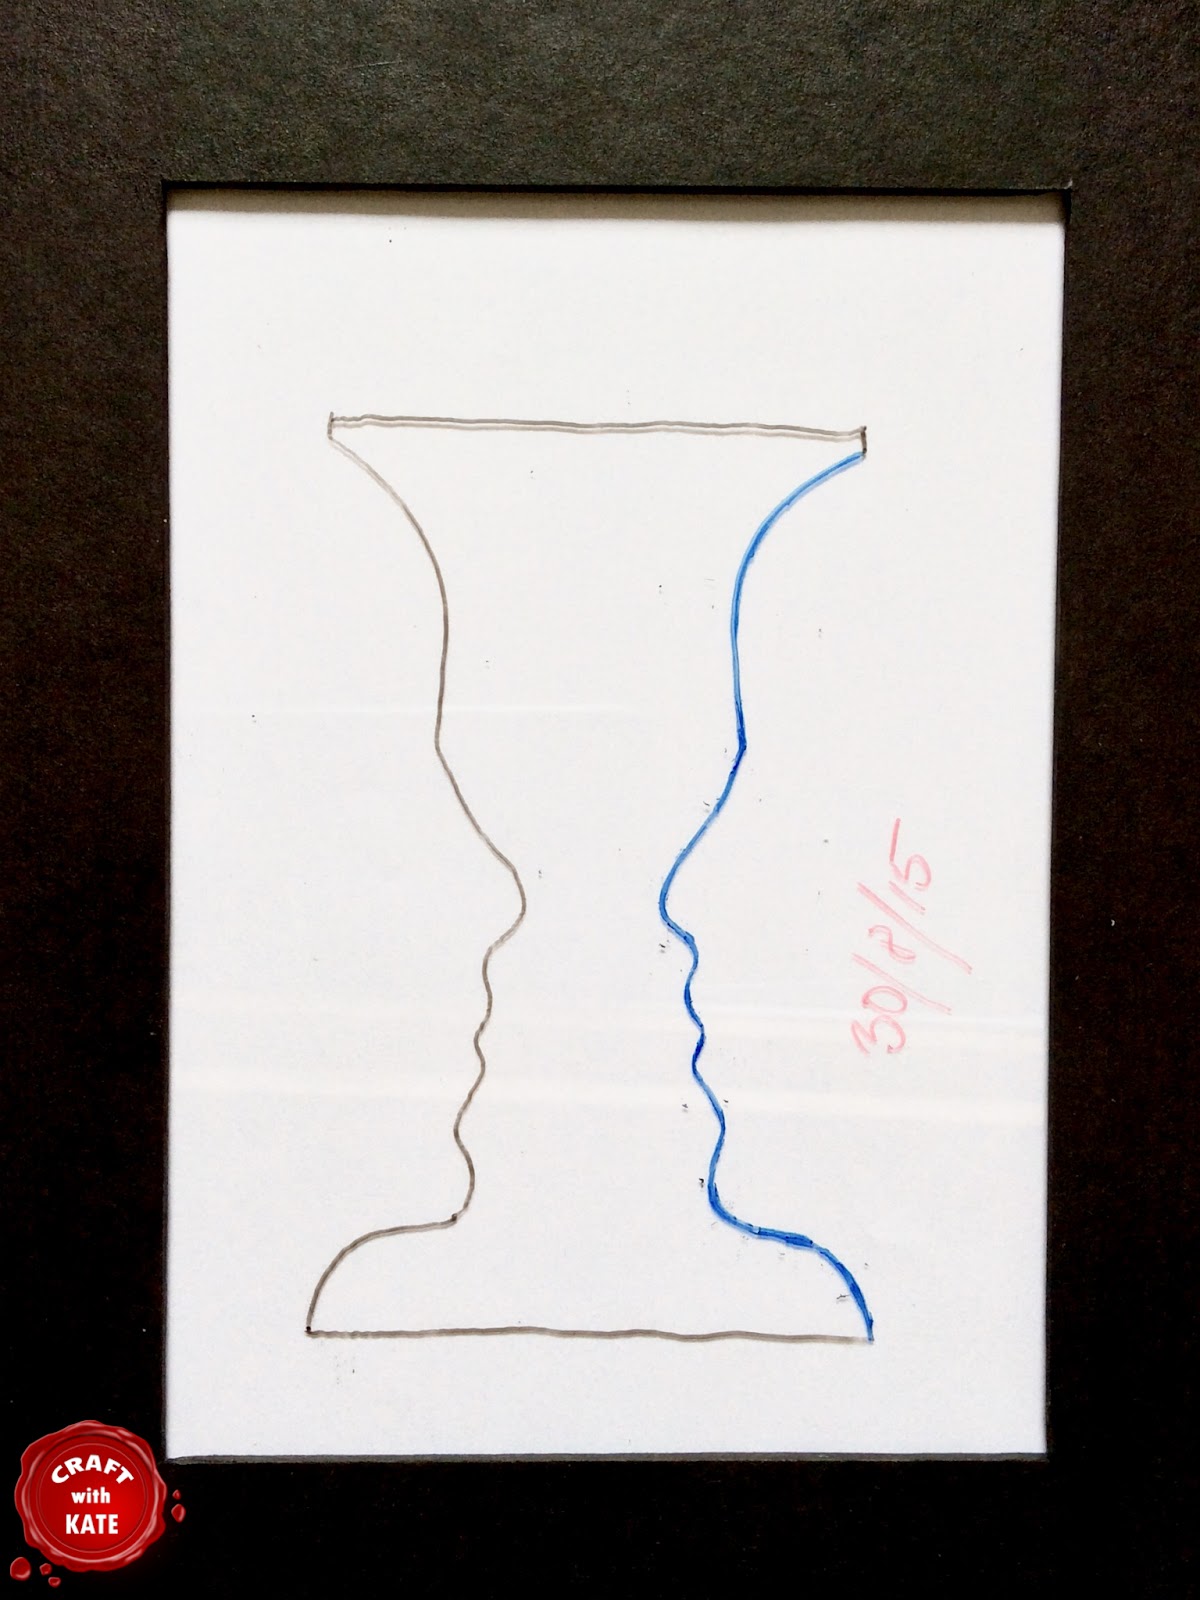
I found Will Kemp Foundations of Drawing course on Lynda.com which seemed to be like a great way how to develop my drawing skill further and because I used the Free Trial offer I had nothing to loose.
It reminded me a theory of the book Drawing on the right side of the brain which Faces/Vase exercise came from.
Back to Will’s course, the first exercise was about
re-programming the brain to draw what it actually sees instead of what it
thinks it sees.
This upside down puzzles was more sophisticated
than the horse puzzle I’d done before. There was a picture included in the
course which I printed it out. Following the instructions from the video section I covered the whole pic before I had a chance to see
it. I uncovered a small portion, drew it, uncovered another portion and so on and I literally had no clue
what it was going to be. after ¾ of drawing it finally hit me that it looked like a portrait.
It still surprises me how easy drawing can be if
you flip your picture upside down and working on small section instead
of the whole which could be very discouraging and scary if you’re
lacking a “drawing confidence “ especially from beginning.
Next time tonal ground drawing so stay tuned :)
Have a great drawing day!
Saturday, 29 August 2015
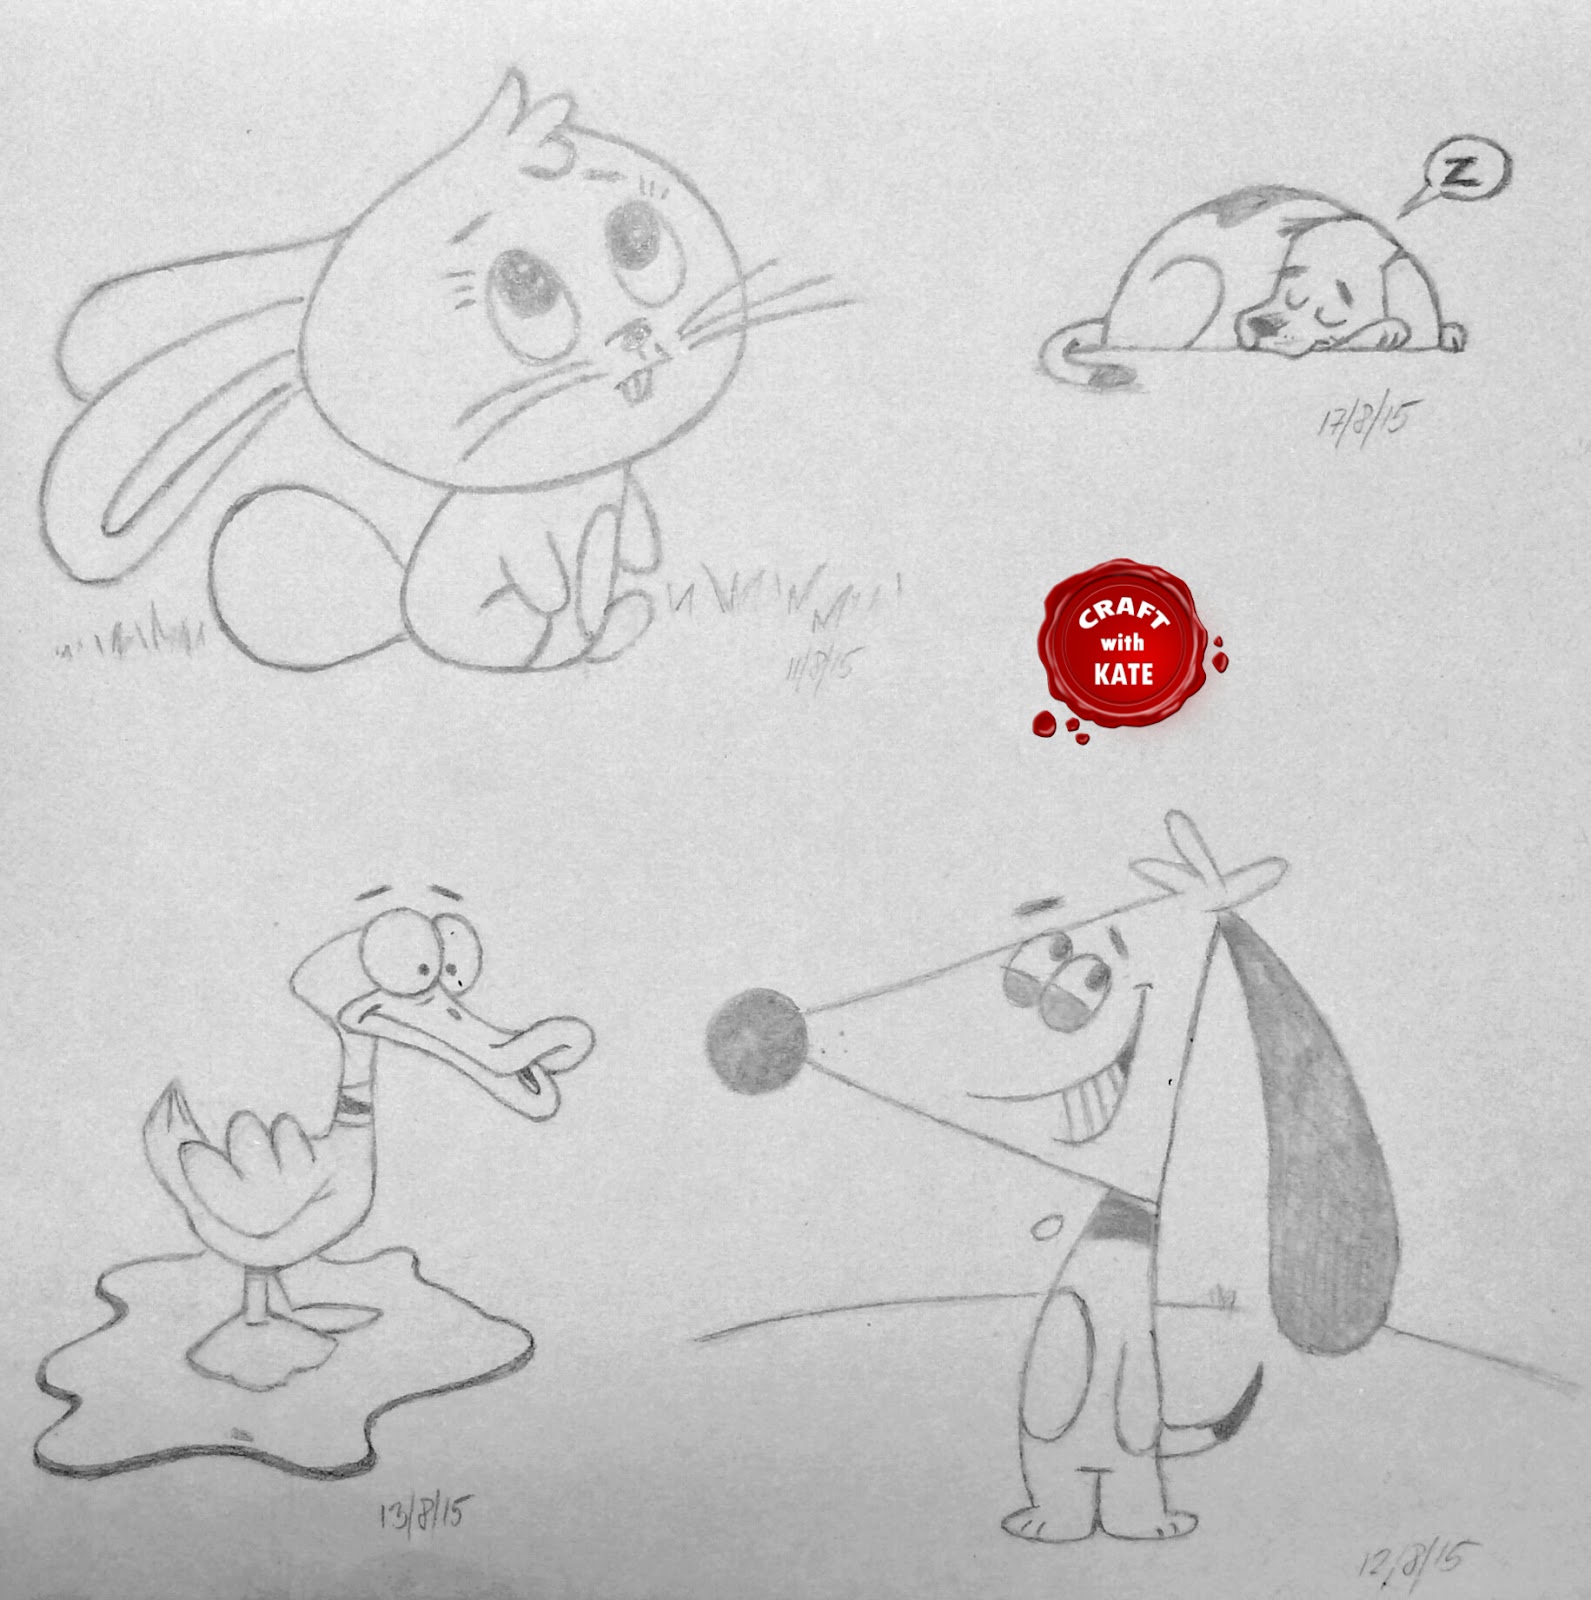
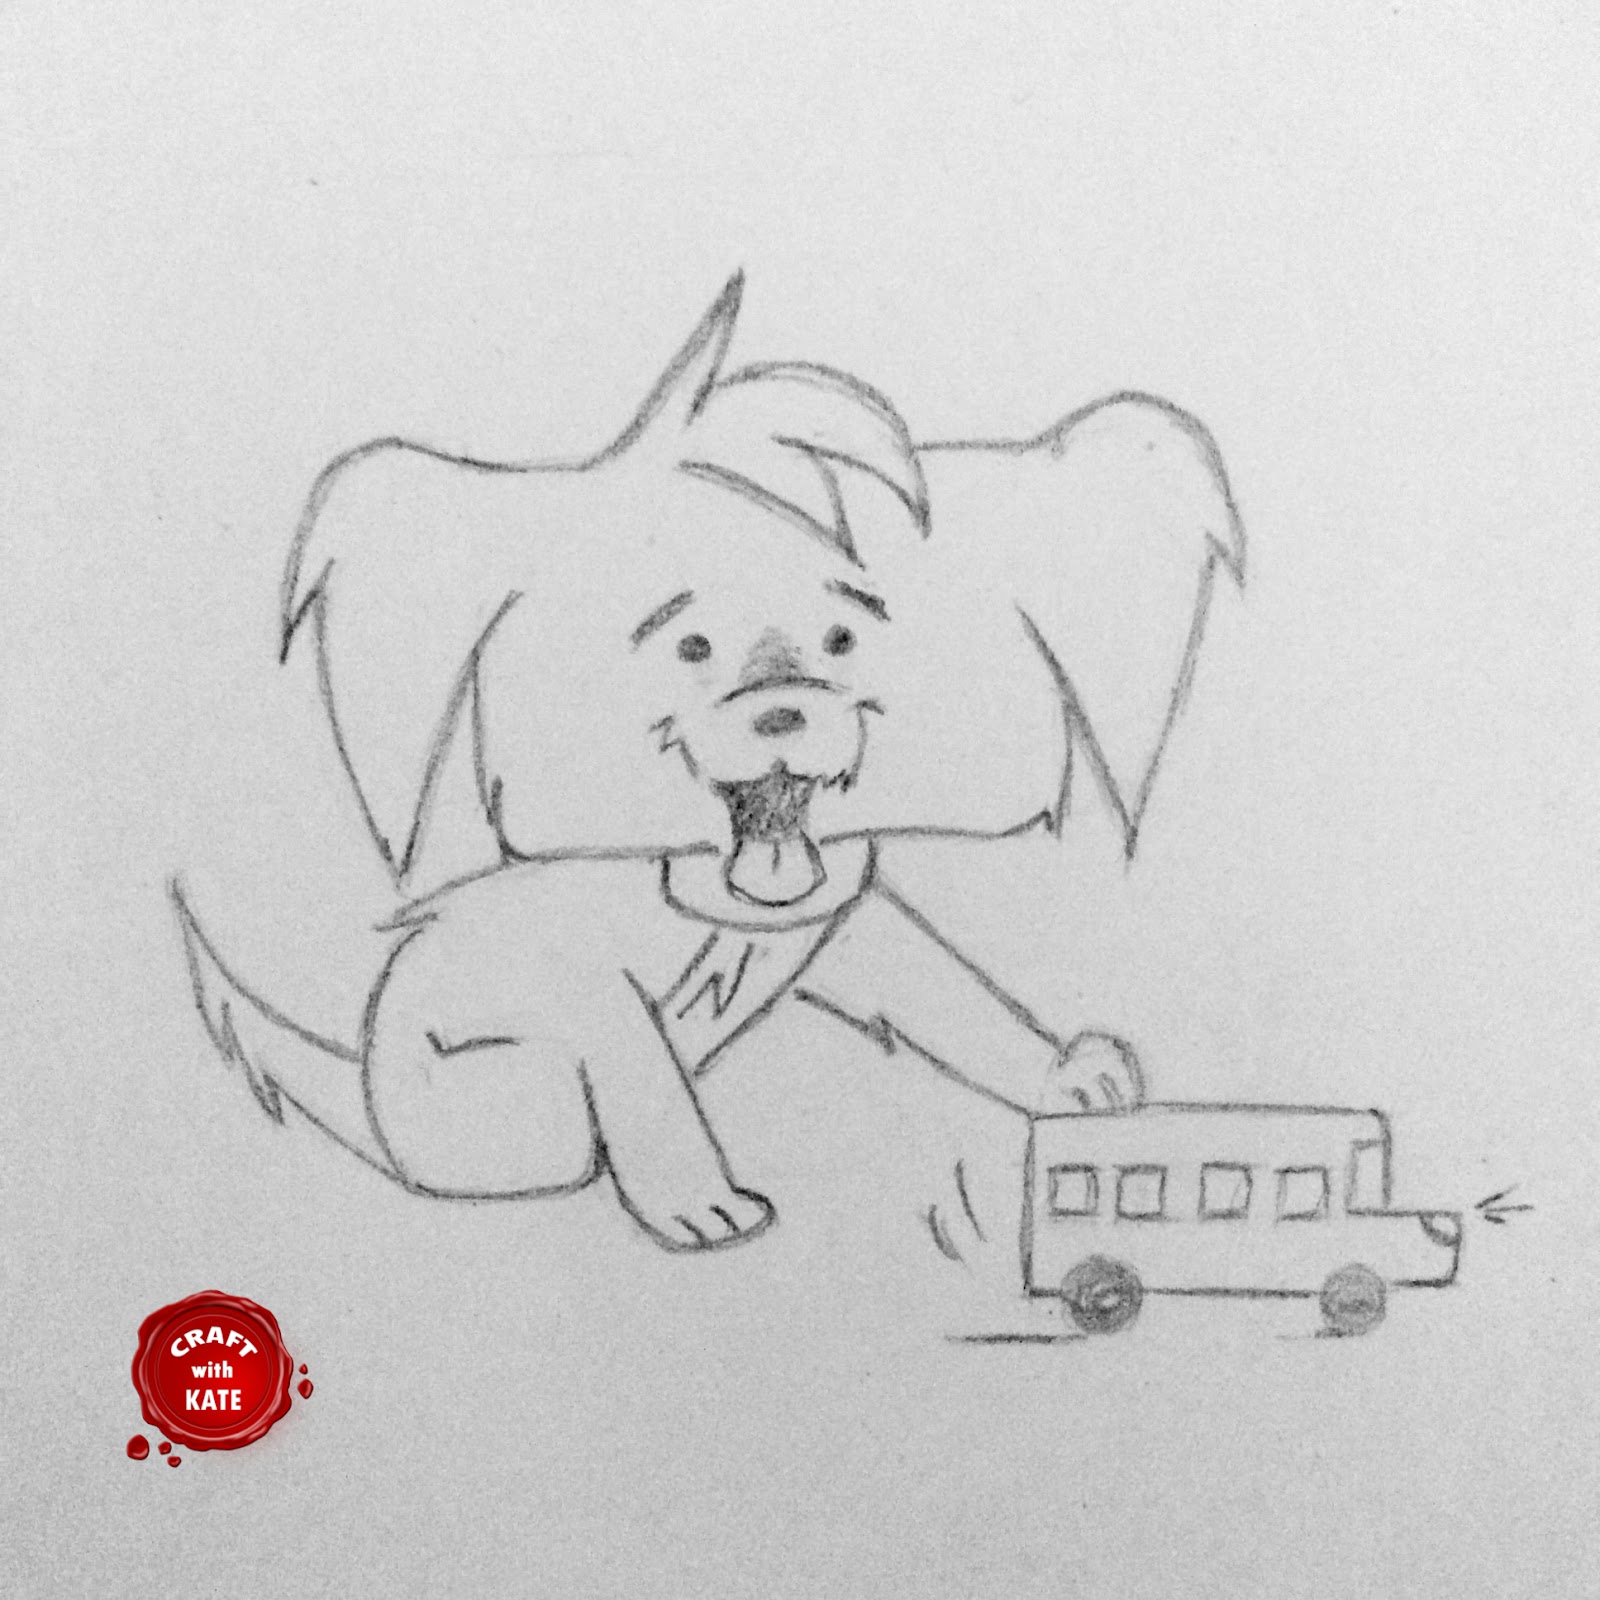
Drawing Journey Part21 - Cartooning Fun
After a strenuous task last time, shading the Kettle, I was left with literally no energy to make another lengthy project.
I was browsing on the net looking for some inspiration and I came across cartooning stuff which was exactly what I needed. Something nice, cute and easily done in few minutes.
I've
bought a Christopher Hart book for kids ages 4 and up. First of all
just because I found it cheap on Ebay and secondly because I still have an
inner kid in me :)
 The
top picture is actually mine. I was trying to come up with something
what would be completely my own and as I was on holiday with no other resources
whatsoever this was an end result of my effort.
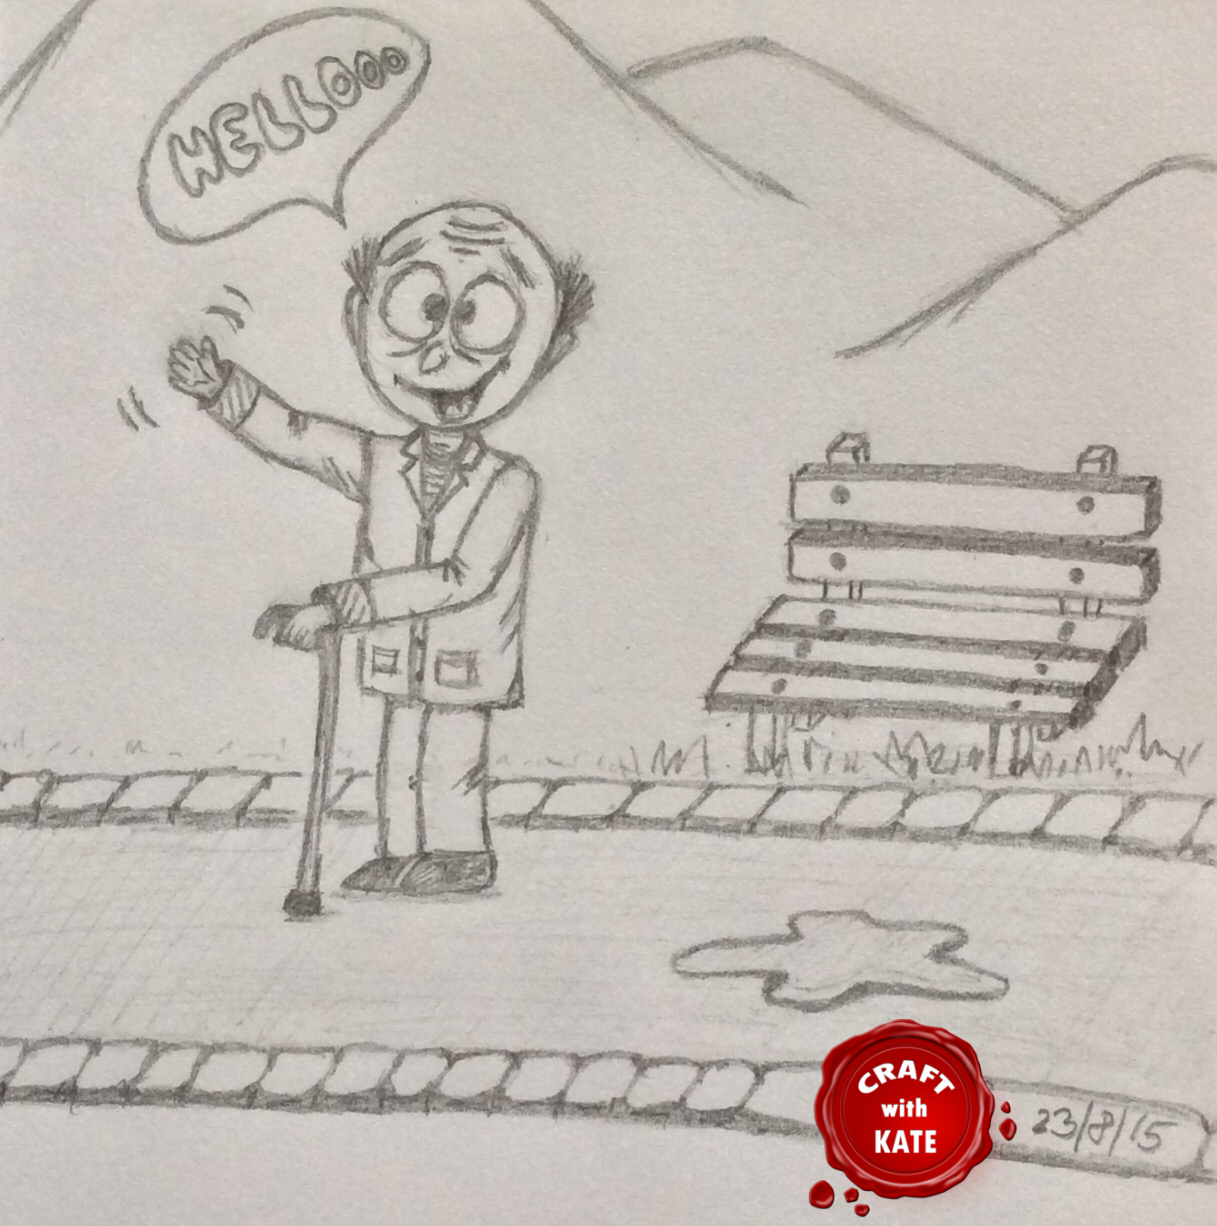
The
top picture is actually mine. I was trying to come up with something
what would be completely my own and as I was on holiday with no other resources
whatsoever this was an end result of my effort.At this point I realized that the Kettle exercise was a last think I drew from DrawPj course. My conclusion is: course is great if you are a responsible student and if you stick with it you will learn a lot.
Unfortunately, this doesn't apply to me as I go where I see something interesting. I must say that Student forum is truly amazing. I keep posting my artwork (Yes, I call it artwork now :) and support I get from the members there is brilliant.

This includes nice comments as well as productive criticism mainly from Cindy (founder of DrawPJ) which I do appreciate. Example of this would be a pointing out that the perspective of the bench on the top picture doesn't really match my guy perspective which I'd never noticed until it was pointed out to me.
Moving on. I discovered another funky drawing course but more about it next time.
See you then & have a great day :)
Saturday, 8 August 2015
Drawing Journey Part20 - Kettle
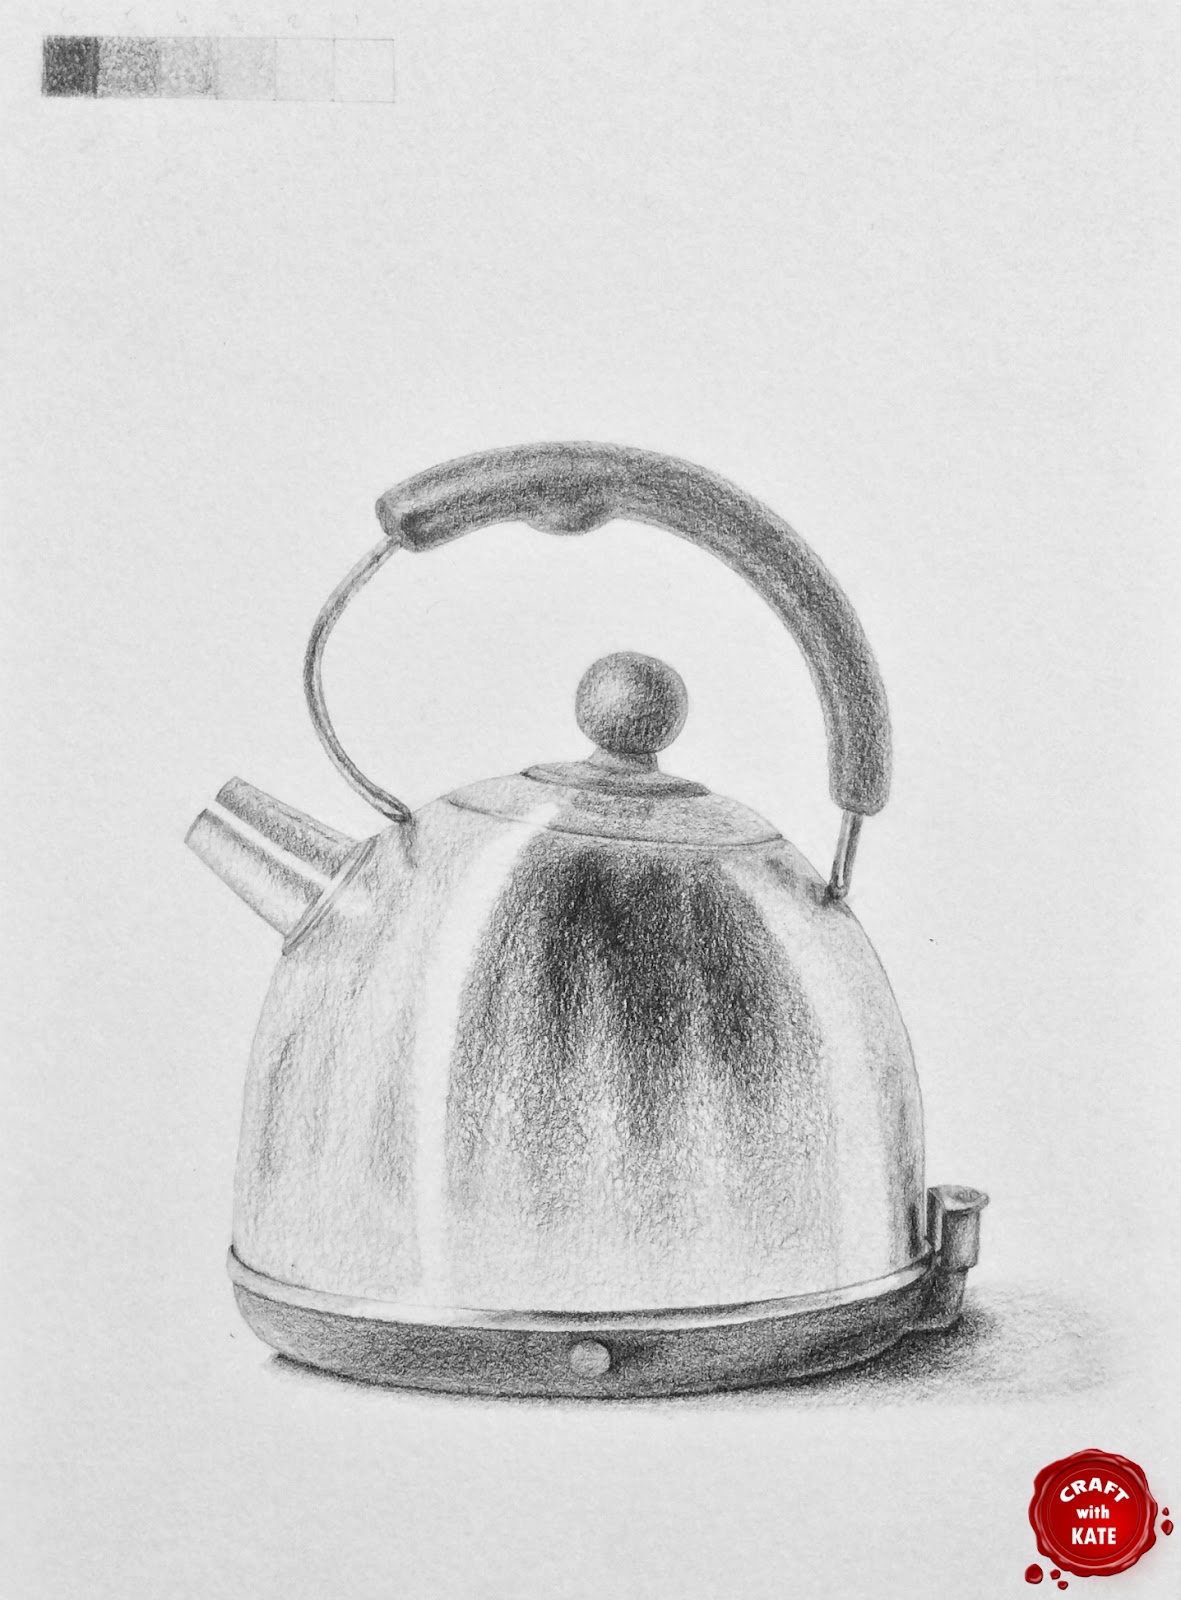
When I first saw what was on the agenda for this week I immediately thought " There is no way in a million years that I can do that"
So, I took a deep breath and started.
I
had an outline to fill in and as the same as previous weeks some
instruction how to accomplish this massive task, at least massive in my
"student's" head, were included.
Recommendation
was not to spent more than 4 hours with it and because I'm
perfectionist and my credo is "If you do something do it properly " I
spent more than 9 hours over few days. I did section by section from
beginning to the end even though instruction were to do it as a whole
and not in sections.
Very
pleased with it and especially after I thought it was impossible it
gave me the whole new level of confidence and first time since I'd
started drawing I felt like an Artist.
This
exercise was somehow a huge breakthrough for me and it did open the
door to a new world of drawing perception (very hard to explain the
feeling I have at the moment :)
Personal notes: a prolonged period of heavy concentration gives you a massive headache!!!
Discovery
: Graphite is lifted up even though a fixative is used. I was working
on this piece for a few days and covering it with some glassine paper to
protect it between my drawing sessions. I noticed that over few days very dark areas, almost black, on Day 1 was middle
grey on Day 3 and at the end I had to retouched picture quite significantly.
Saturday, 1 August 2015
Drawing Journey Part19 - Shade and Form
 So, I sort of finished Lesson 1 and I must admit that I was very excited to start Lesson 2 Shade and Form from DrawPj course.
Week 1:
The
exercise for this week was all about to creating value scale and
starting to recognize the slight differences between them. As much as it
was beneficial I wanted to get into " a real shading" :)
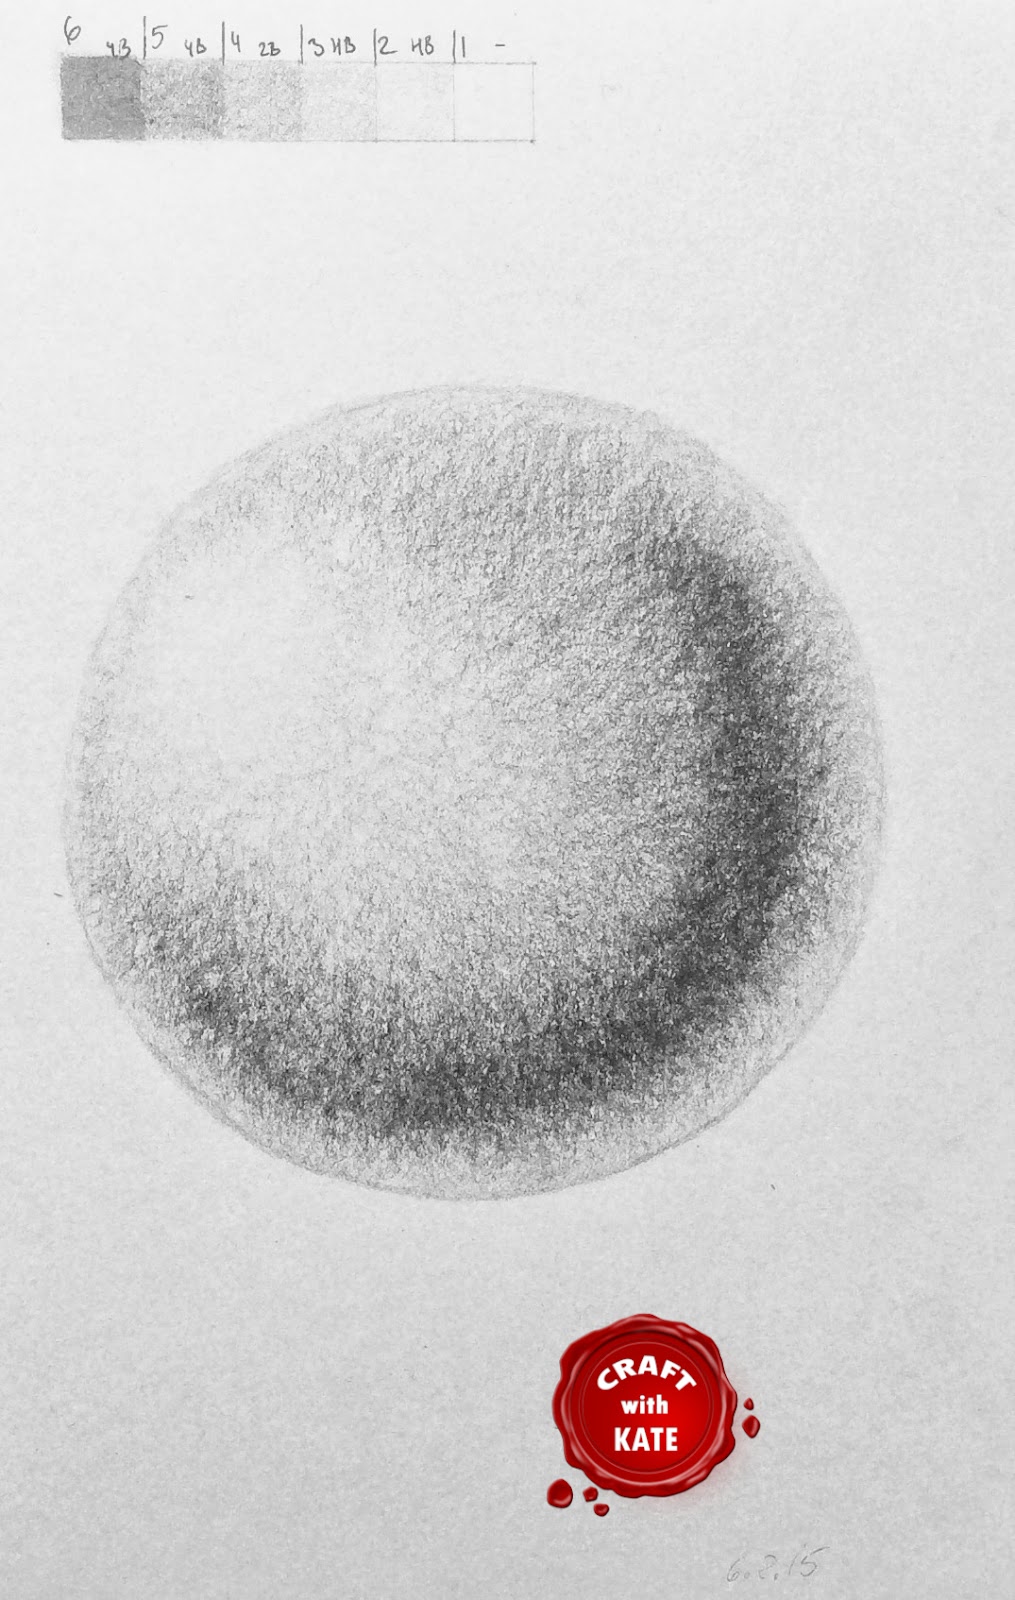
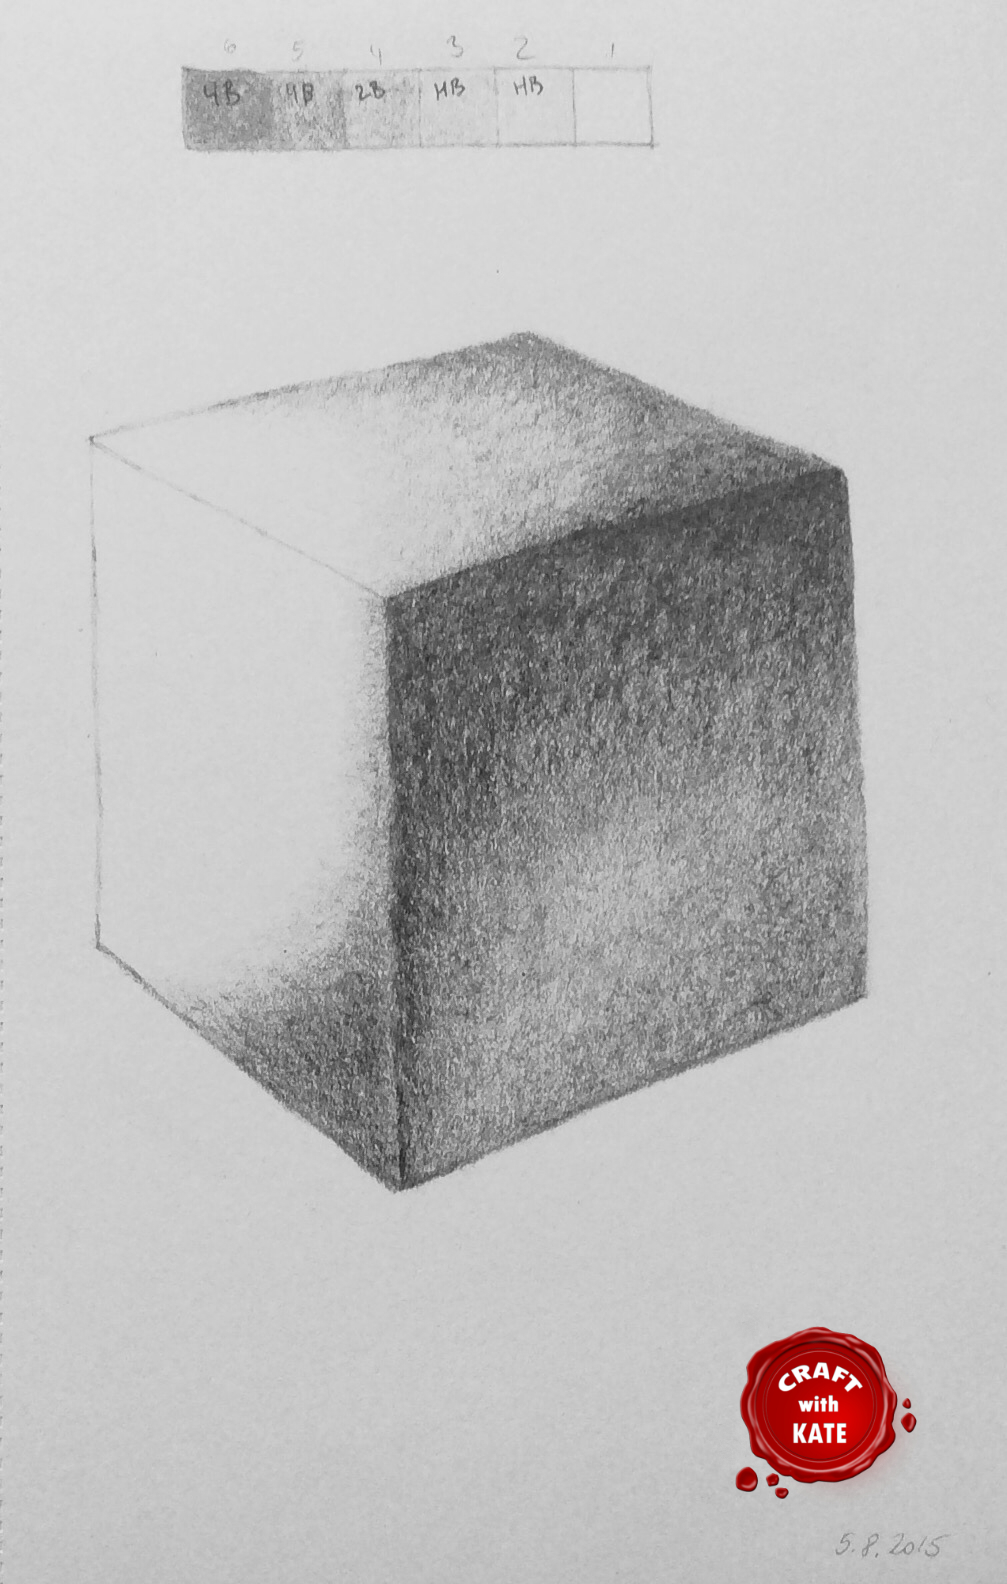
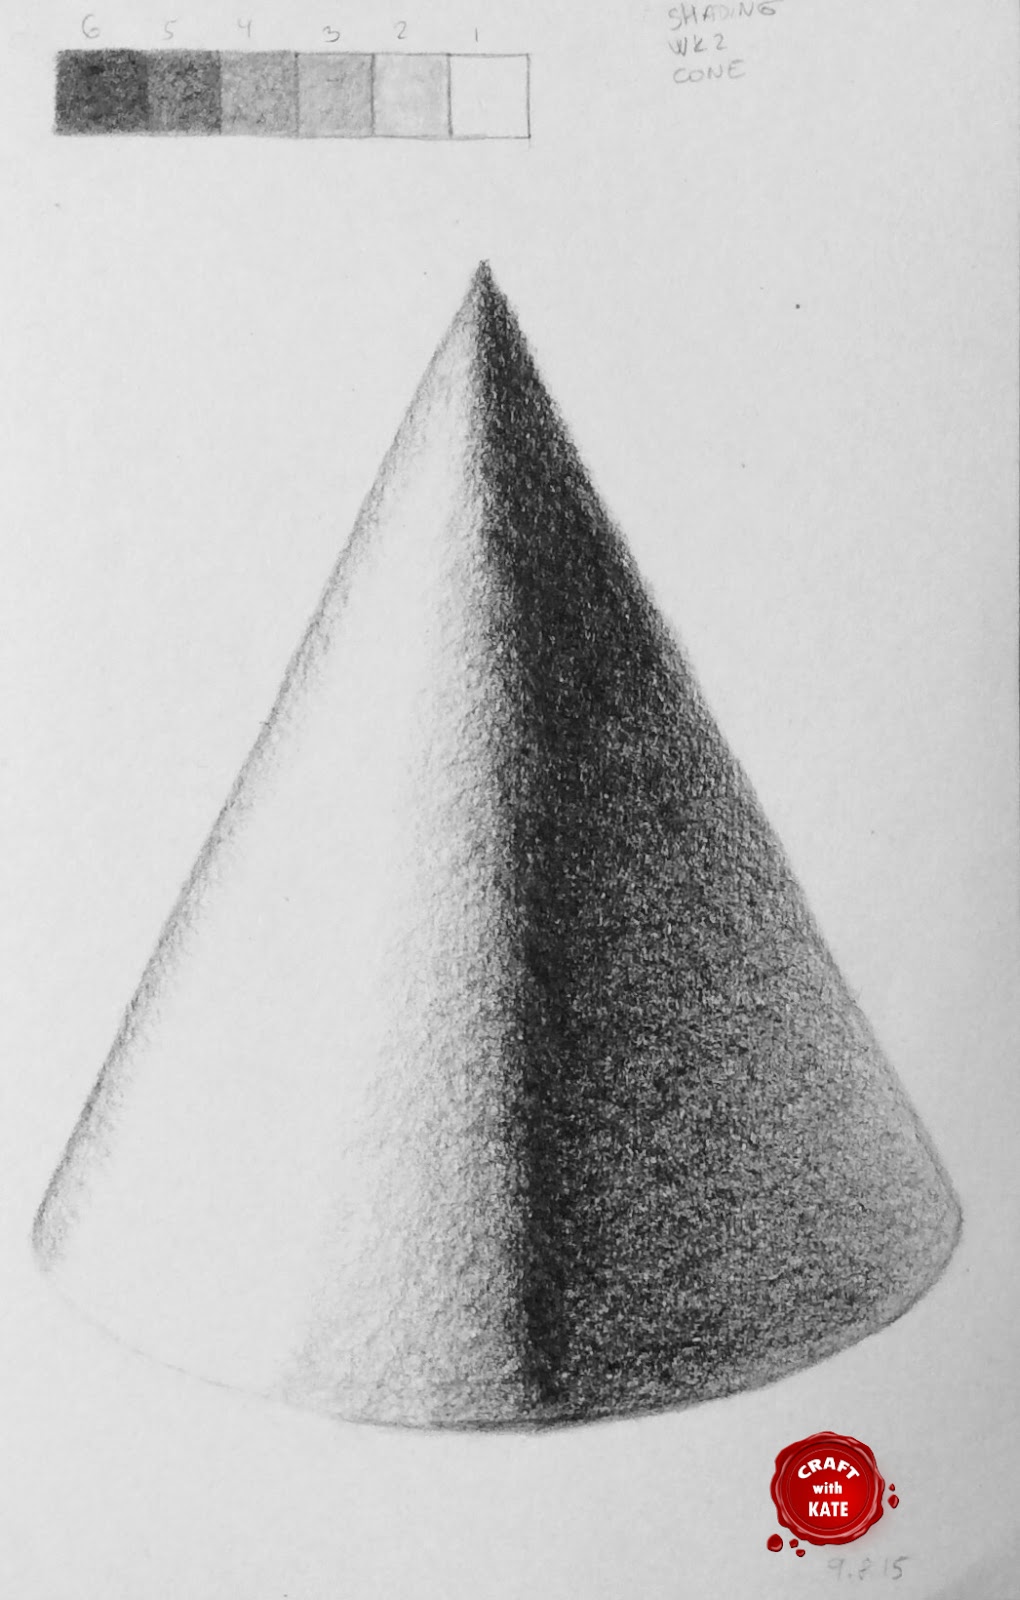
Week 2: Cube, Sphere, Cone & Cylinder
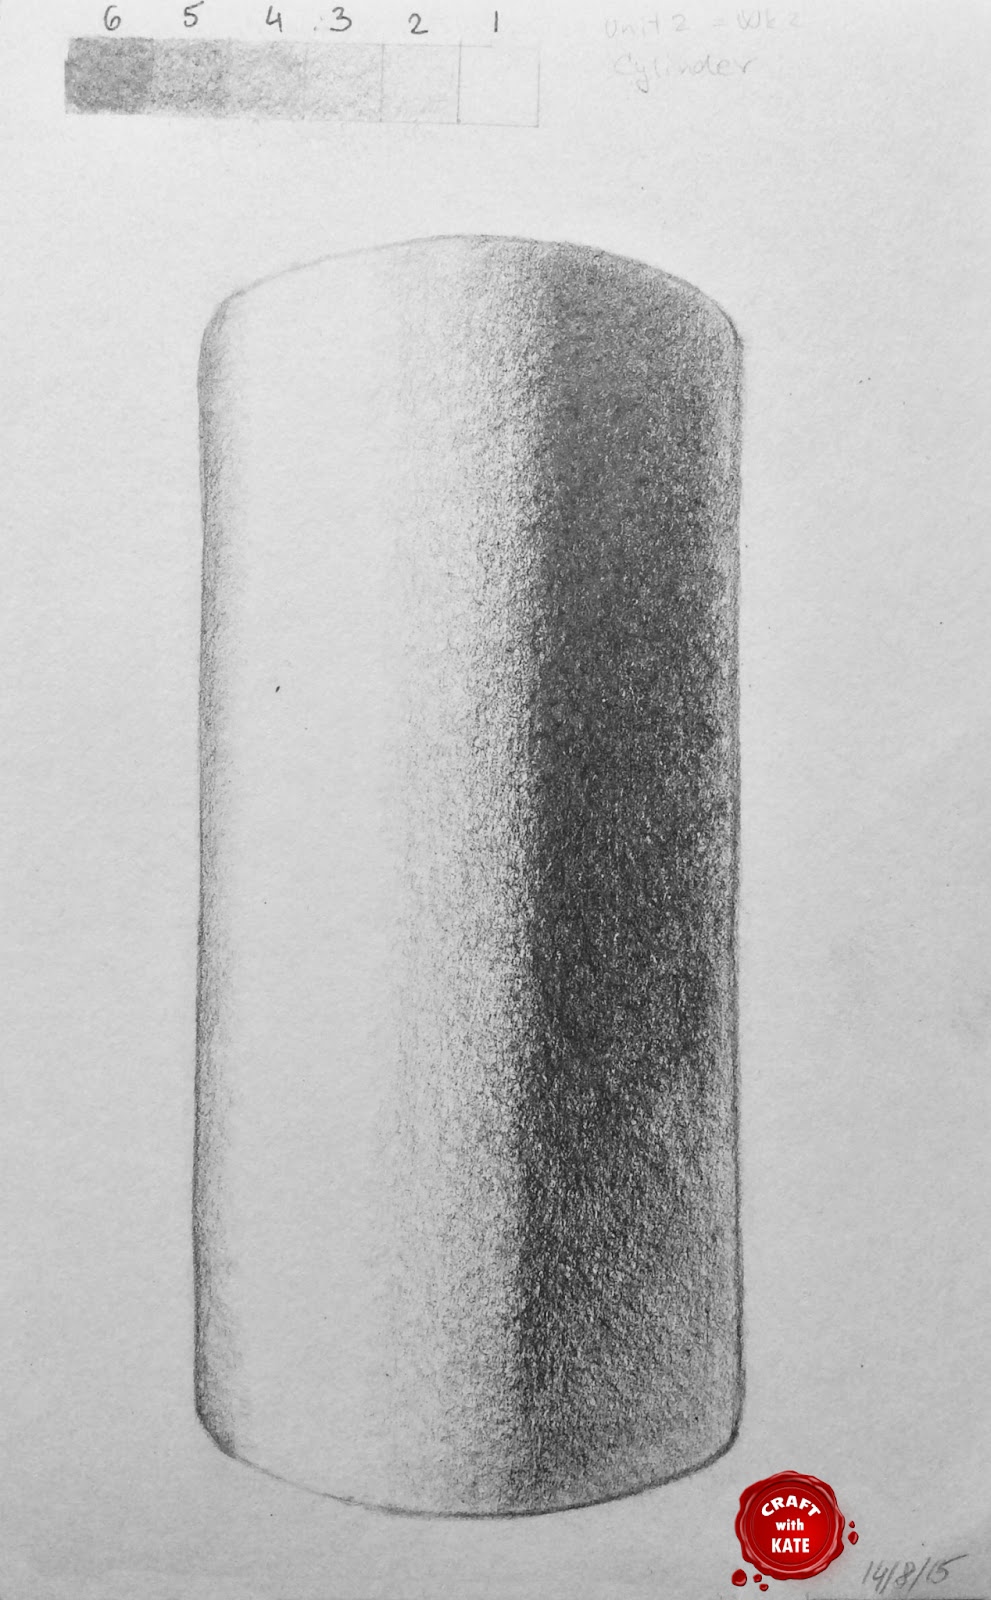 I
did love these exercises. I had an outlines to fill in with different
values/tones. Instructions were broken down into few steps and some
hints and tips were included as well. I mostly enjoyed a sphere and
cone.
I
did love these exercises. I had an outlines to fill in with different
values/tones. Instructions were broken down into few steps and some
hints and tips were included as well. I mostly enjoyed a sphere and
cone.
Overall I found these exercises a little bit repetitive
especially shading the cylinder as this one was a last practice and was
not as a fun as previous ones.
Looking at them all finished make me feel
very proud of myself . I've had a REAL sense of satisfaction J
Personal
note: I started to feel more comfortable and confident with drawing and
shading. Looking for difference between various shades of grey started to be
more automatic.
Next
time is Week 3 Shading a Kettle so fingers
crossed.
Wednesday, 29 July 2015
Drawing Journey Part18 - Outline Drawing Summary
Week 3
I completely skipped the exercises for this week. It was a construction drawing of a simple lamp with guidelines in place. For some reason I could not forced myself into drawing this and trust me I was trying so hard so many times. After I realized that I'd not drawn anything for over a week I just simply moved on to Week 4.
Week 4
This week was about Grid method for transferring an outline. Unfortunately week 3 repeated itself and I didn't do any exercises from this week either. Now I think it might be due to lack of my interest or appeal in a pictures provided in course materials.
Week 5
As you can guessed I skipped this one as well. To my surprise this was the same exercise of Old Hay Shed which I'd done already in 6 Pencil Techniques course few weeks back.
Week 6- 7
Outline drawing of Plumeria flower, this was a final project for the Unit 1 - Outline Drawing. I did not even attempt it and my plan is go directly to Unit 2-Shading and Form.
Happy Drawing :)
Personal Note: Please note this is my own personal experience and I know many people on drawpj forum who actually enjoyed themselves drawing these exercises. Information in course materials has it own value just pictures on their own did not work for me at all.
Subscribe to:
Comments (Atom)