Week 3
I completely skipped the exercises for this week. It was a construction drawing of a simple lamp with guidelines in place. For some reason I could not forced myself into drawing this and trust me I was trying so hard so many times. After I realized that I'd not drawn anything for over a week I just simply moved on to Week 4.
Week 4
This week was about Grid method for transferring an outline. Unfortunately week 3 repeated itself and I didn't do any exercises from this week either. Now I think it might be due to lack of my interest or appeal in a pictures provided in course materials.
Week 5
As you can guessed I skipped this one as well. To my surprise this was the same exercise of Old Hay Shed which I'd done already in 6 Pencil Techniques course few weeks back.
Week 6- 7
Outline drawing of Plumeria flower, this was a final project for the Unit 1 - Outline Drawing. I did not even attempt it and my plan is go directly to Unit 2-Shading and Form.
Happy Drawing :)
Personal Note: Please note this is my own personal experience and I know many people on drawpj forum who actually enjoyed themselves drawing these exercises. Information in course materials has it own value just pictures on their own did not work for me at all.
Wednesday, 29 July 2015
Sunday, 26 July 2015
Drawing Journey Part17 - Chuk the Dog

Copy the shapes: very basic just copy as precisely as you can some basic shapes like a circle, ellipse, egg, pear, bean and moon or banana shape.
Frog Dog: this exercise had two steps.
Step One = following step by step instructions on how to create a construction drawing. I did not like construction drawing method at all. I spent far to much time on finishing this step just to find out that I needed to erase it afterwards.
Step Two = outline drawing and drawing personalization. I added a background and made some shading attempt. At the end I named my doggy Chuck. This part was much better and I had a fun - well deserved after frustrating step one.
See you next time :)
Wednesday, 22 July 2015
Drawing Journey Part16 - Upside Down Puzzle
 I found this funky puzzle while browsing and searching for ultimate drawing book/resources. It came from Lee Hammond's Big Book of Drawing.
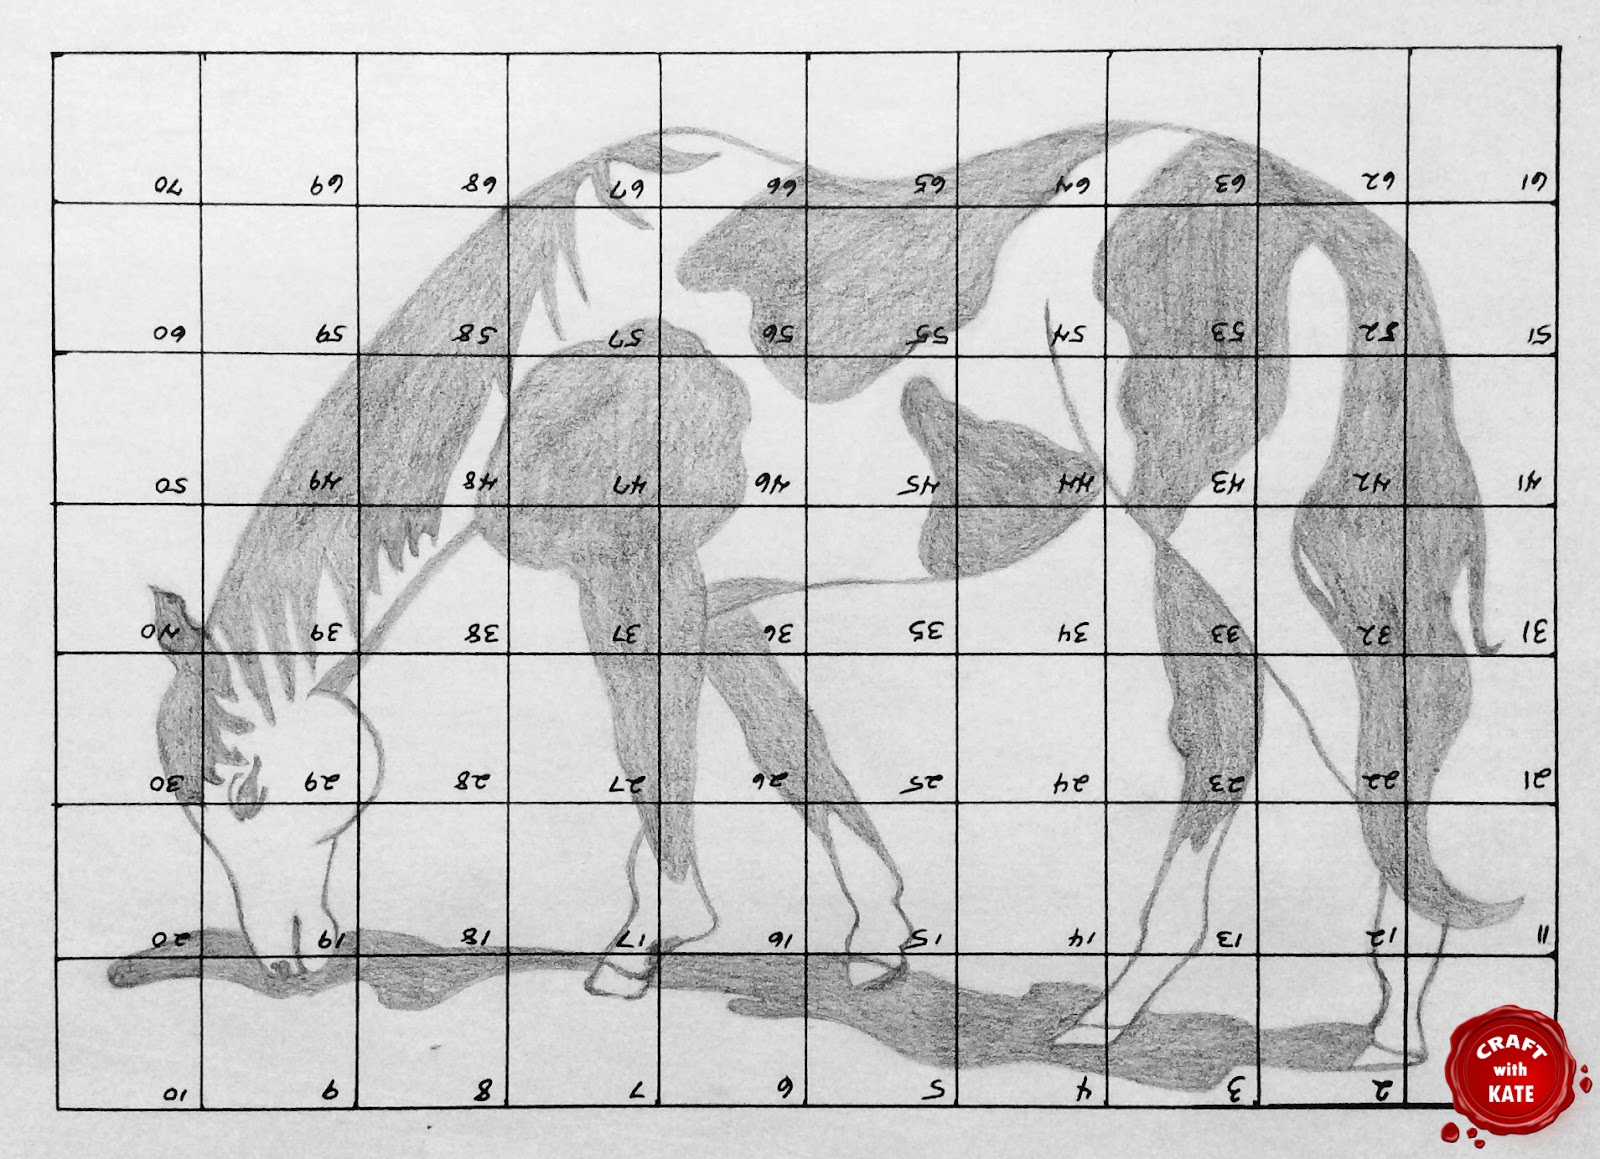
I started with making a copy using a copy machine and I cut out all individual squares - all together 70 squares. I also made a copy of the empty grid. Notice that each square in the grid is numbered - very important.
 Using the elimination method, from simplest shape to complicated ones, I took one cut out square, found the corespondent number in empty grid and drew exact copy of it. I repeated it 69 times more and when I was done I turned it up side down.
End result was amazing. Under no circumstance I would be able to draw a horse like that but when it was broken down to the small chunks and turned up side down suddenly it all became possible.
Good news is, every single time when you filled stuck with your drawing just turn reference pic up side down, cover parts you don't need to see so you are not distracted and try again. I bet second attempt will be far far more satisfying then the first one.
See you next time :)
Note: I must say that in original filled grid some lines when aligned one by one didn't match however I tweak my end picture so they did.
Sunday, 19 July 2015
Drawing Journey Part15 - Loose Curves
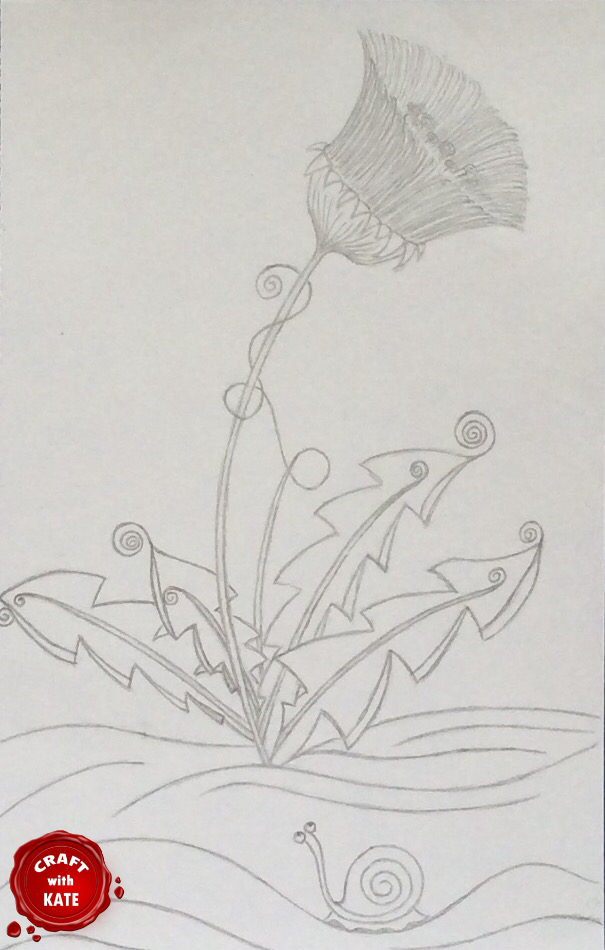 Moving on, I started the Outline Drawing course by Cindy Wider and these are first exercises in Week1.
Loose curves: the whole idea was about to be able to draw a curve using sketching strokes instead of few straight lines forming the curve. The given exercise was just something abstract however I chose to tweak it a little and I drew this Futuristic Dandelion instead. I must say I was pretty impressed with myself :)
Copy the pattern: main focus was on allocating points in a semi finished grid as precisely as possible and then joining them together forming lines and curve. Also it was a good practice on splitting lines in halves, quarters and so on.
I did some additional recommended Extra Practice for a different sizes of ellipses as they are apparently very important for drawing realistically.
Overall I am quiet pleased with the outcome and I am ready for exercise/-s in Week 2 .
Happy Drawing and see you next time :)
Thursday, 16 July 2015
Drawing Journey Part14 - Resources Update
A just a little update on the resources I'm using.
As an addition to materials I mentioned in Drawing Journey Part2 I got myself:
- Daler RowneyAquafine Watercolour smooth hot pressed paper pad - I could not believed how many different types of papers are out there and of course I bought the wrong one for the purpose I needed. Good advice - search for the difference between cold and hot pressed watercolour paper :)
- Winsor and Newton Medium kneaded putty rubber - it is brilliant for lifting (press and lift) graphite form paper instead of rubbing it off (left to right motion) with vinyl eraser
- Paper stump (no brand)- used for blending graphite
- Masking tape (no brand) - very important when you do picture/sketch transfer
- Fine Sandpaper - for preparing my pencils
Resources and resources additions:
I had many emails asking me for a name of books mentioned in Part1 so here they are
Book 1= How to Draw a Cool Stuff (purple one) by Catherine V. Holmes - this is the one even child can follow. There are an instructions on how to draw a very basic shapes step-by-step. This is a very nice book but I was missing a methodical approach where I could build on some previous knowledge so I did not use it very much ( to be exact I used it about five times).
Book 2= Drawing for the Absolute Beginner by Mark and Mary Willenbrink - I ditched this book as I found out it was no use to me. It was fine to read it but as soon as I tried to follow some tutorials I got immediately lost. Contains a little bit of everything and it could be good as a drawing techniques overview. Just did not work for me.
Additions and other resources:
Drawing on the Right Side of the Brain by Betty Edwards - it is more about psychology behind the drawing. It is a hard read for me as I found the writing style a little bit boring and I needed to force myself to continue but info there is very good even thought is somehow hidden in a lots of unnecessary words. However, it makes you think about things. The exercises included are very interesting I must say.
6 Pencil Techniques by Cindy Wider. This is an online email based two weeks taster course with two exercises and two bonus ones . I paid 0.67 GBP (equivalent to 1USD) It has simple instruction from how to hold the pencil to how to make a different strokes to achieve different textures. I did learn a lot from it.
and Drawing, Shading and Portraiture Course also by Cindy Wider. This is a self teach course which I found discounted on Amazon local and I am planning to follow this course for the next few weeks.
Have a nice day and stay tuned for another drawing adventure :)
Note: Just to say I have not received any commissions for mentioning these brands/names
Wednesday, 15 July 2015
Drawing Journey Part13 - Old Hay Shed

The outline of the shed was provided in the one of course pdfs as well as some notes on how to shade it.
I was terrified when I was starring for few minutes at an empty paper with few lines not knowing where to start than I made a big decision and went for something easy like big black spot inside of the shed. Then I spread cross roof, wood, background, trees and so on. When I finished with all "required parts" I added my own such as additional tree branch on the left, bees, birds and butterfly.
Knowing that I've done it feels great and rewarding however feels confusing at the same time. Took me few days to finish it. During these few day my feelings were going up and down, from "I can do this" to "There is no way I can pull it through" and seeing it in front of me is like somebody else drew it for me :)
Thursday, 9 July 2015
Drawing Journey Part12 - Pencil Strokes
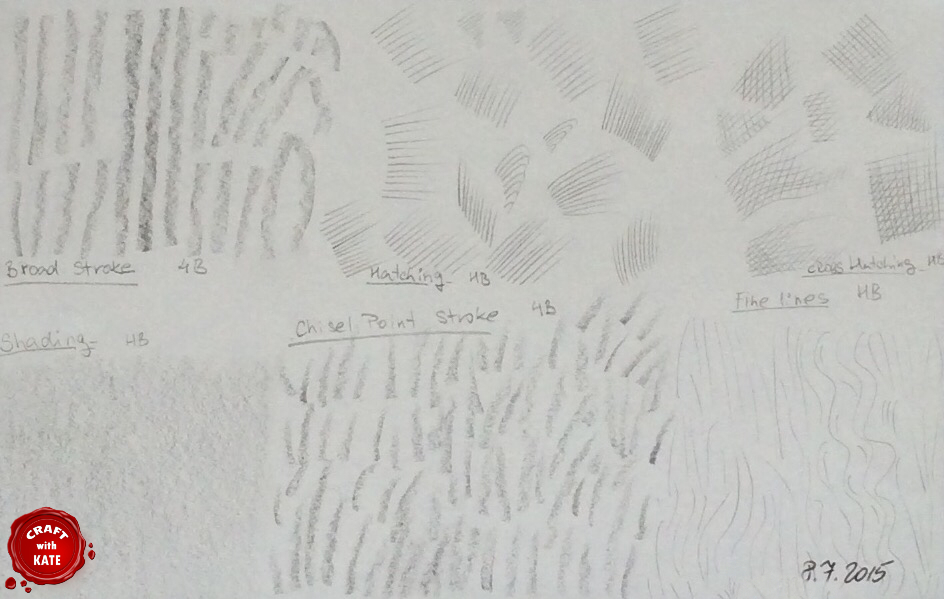
I did enjoy it and found a pencil preparation quite interesting, especially for a chisel point which I'd never heard of before in relation with pencil.
There was a recommendation that you should fill one full A4(210x297mm) with each stroke. I can honestly say that I managed to fill a half of A4 and got bored (happens to me easily I must admit) and I did not practice any of hatching, crosshatching or fine lines. Broad stroke was quite tricky for me for some reason and I fully enjoy chisel point stroke.
Next: Putting in all together with Old Hay shed attempt. See you then :)
Wednesday, 8 July 2015
Drawing Journey Part11 - Corner of My Room
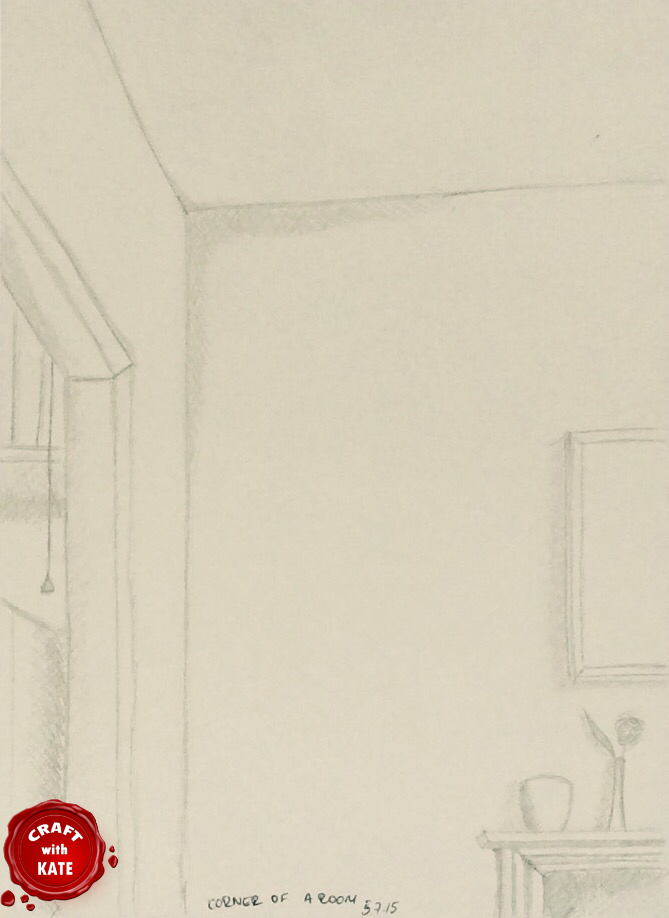
I was so pleased with this one as I felt like I could finally cope with it. After all I found out that I was very comfortable with drawing straight lines, parallel lines and cubes while drawing curved lines threw my sense for proportions completely off.
Self Evaluation:
Positives: looks exactly like a corner of my living room, I like it overall
Negatives: none
Action Plan: keep drawing relaxed at all times
Feelings: felt more confident, also I felt like I had a control over drawing instead of panickin
Have a nice drawing day and see you next time :)
Tuesday, 7 July 2015
Drawing Journey Part10 - Left Hand

Another strange feeling as I was trying to keep my left hand still while drawing with my right one.
This time I kept in my mind that I needed to speed up a little and not overthink it. I set up an alarm clock to 20 minutes and started to draw.
Self Evaluation:
Positives: looks better than I though it would be, looks like a hand, I like the palm and fingers, still can not believe it was me who drew it
Negatives: maybe more shading on forearm
Action Plan: keep drawing without thinking and don't let any doubts or worry enter my mind
Feelings: I feel very encouraged now especially after my self portrait sort of fiasco :)
Next will be a Corner of My room. Stay tuned :)
Monday, 6 July 2015
Drawing Journey Part9 - Self Portrait

Mine Pre-instruction Drawing will be: Self portrait, hand and corner of the room
This is about the first one - Self Portrait
I had a very strange feeling to look at myself in the mirror and observing all different shapes and shades and wrinkles ... and you get the picture. Usually if I applied make up early morning it takes me no more than few minutes and even than I watch TV with one eye half open so suddenly staring at my face and trying to draw it was very uncomfortable for me for some reason.
So, this exercise should have taken about 30 minutes - in my case 2.5 hours. I freaked myself so badly that I was trying to do everything perfect. I spent much more time with small portions like ear or nose than I should've. The complexity of facial expression was overwhelming, did not know where to start and generally I just wanted to give up an move on to something else.
Anyhow, after all that effort I could confidently said that my self portrait did not look at all like me and I mean not like me at all. Good proof was when I sent a picture to my boyfriend and his reply was "Who it should be again?"
That led to thinking about one of my ground rules in my previous post - keep good sense of humor :)
Self Evaluation:
Positives: it still reminds a human being, I like an left ear, right eye, lips are not bad either and I like nostrilsNegatives: does not look like me at all (however there is resemblance with someone but still couldn't figure out whom) and took me far to long
Action Plan : care less, don't spent far to much time with just one small section, don't overthink it and just relax and let go
Next time will be attempting to draw my left hand. Fingers crossed that will go better :)
Saturday, 4 July 2015
Drawing Journey Part8 - Cube Basic Shape

 Apparently there are four basic shapes square, circle, triangle and rectangular and any object can be simplified into these shapes. With additional few lines you can transform 2d object to 3d so from a square you can draw a cube, from a circle a sphere, from a triangle a cone and from a rectangular a cylinder.
I decided to start with a cube as I found it the simplest from all - just few parallel lines. How hard it can be? Right?
I did three session and started with very basic cubes trying to draw them from different angles. Eventually I got bored with simple forms and started adding more details to it. Was quite surprised when I finished and realized that I drew a cute Robot. I just let myself go without trying hard and some inner feeling was guiding me. Then I understood what people meant by " drawing was unfolding in front of my eyes" feeling.
As you can see I progressed from simply shapes to more complicated ones. Some of them involved quite a lot of thinking which I did not expect but found it relaxing at same time.
After all, had a great sense of achievement :)
Note: small written numbers on picture represent the sequence in which I was drawing however with some I got back to and re-do them completely.
i.e. number 6 was a plain cube - one hour later got back to it and made it a robot or number 12 was a dice from weird angle, did not like, it started to play with it and made it to Telly Family :)
Friday, 3 July 2015
Drawing Journey Part7 - First Attempt
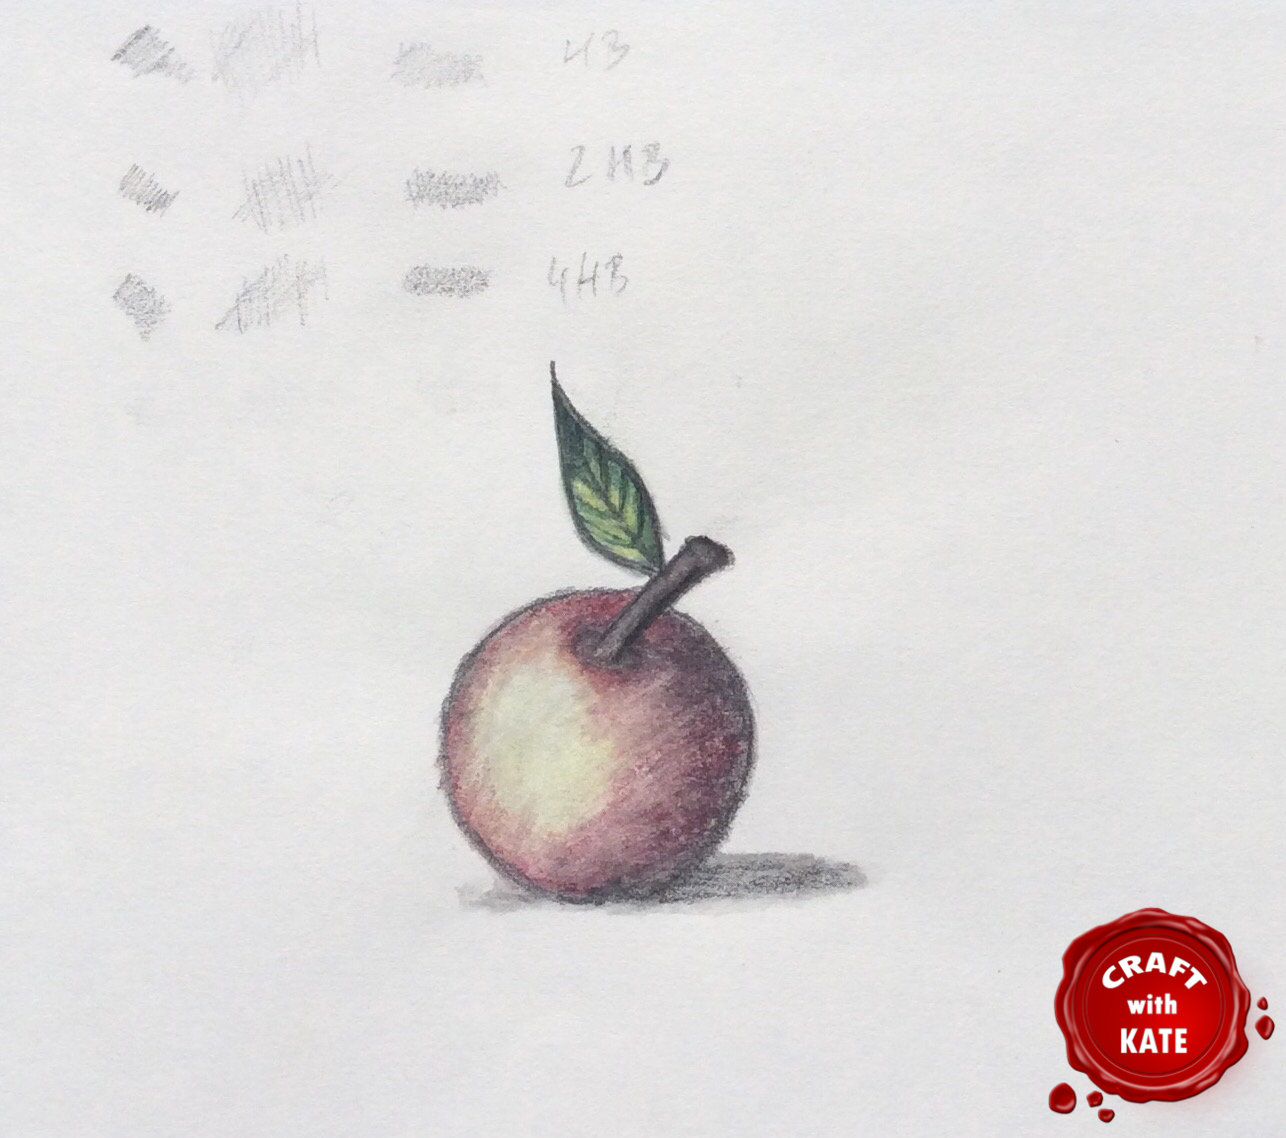 This was my very first attempt to draw something. Came to me very spontaneous after I'd seen some tutorial about light reflection from a ball.
So firstly I drew an outline of the ball which would be a circle. Then I started to play with shading, added some cast shadow and then I started with adding more details like a stem and leaf.
I recently bought a watercolor pencils for coloring stamp imprints and I thought it would be good opportunity to try them out. To be honest I still can not get over them. I was not aware that such a thing even existed and it is like a magic happening in front of your eyes when you slowly add water, such a brilliant idea to put watercolor pigment into a pencil shape.
And "VOILA" a piece a fruit was drawn. However I am still not sure if it looks more like an apple or a plum ;)
Thursday, 2 July 2015
Drawing Journey Part6 - Ground Rules
Writing down some ground rules might have been seen as a silly idea first but over the time when there is a potential for failure and frustration is very important to stay motivated and keep trying - practice makes it perfect.
This is especially important when you learn a new skill. It needs to be practice about 10000 time to master it and a consistency is the key to success.
My ground rules:
1. Have a fun - the most important from all!
2. Have a sense of humor and Be kind to yourself - look for something nice in your drawing instead of criticizing it.
3. Do the research to find the best resources for learning - once you found them stop looking for new ones. Spend more time with drawing that browsing on the internet (I tend to overdo researching stage!).
4. Stay in relevant lesson - don't skip to more advanced ones. Too much too soon leads to frustration.
5. Practice until it's automatic and you don't need to concentrate anymore.
6. When drawing feels natural practice for two more sessions - helps pushing information from short term memory to long one.
7. Have a look back from time to time - you can see how much you have progressed when comparing your old work with new one.
8. Take break - especially when you feel you are about to loose your patience. Drawing needs to be associate with something nice instead of feeling bad.
9. Keep going and don't give up under any circumstance. Learning a new skill requires a lots of time and effort but it's all worth it at the end.
10. When you feel down read this rules from beginning ;)
Note: Remember that although you are not Picasso yet you have a great potential to become one !
Wednesday, 1 July 2015
Drawing Journey Part5 - Dark Side of Drawing Board
 Side Two- Part3
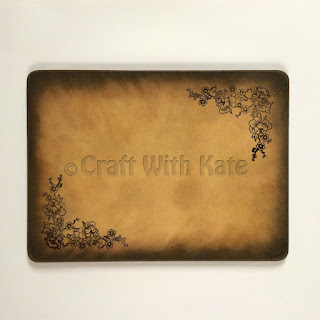
At the beginning of making this board I had no clue what to do with other side. Initially I just wanted to paint in with acrylic paint but after the inking side one I got into a flow and could not stop with playing with inks.

First of all I covered the whole surface with Distress Vintage Photo ink in random directions.
With the wet blending tool I applied Distress Walnut Stain ink about 5cm around the edges and carefully blended distress Black Soot ink in few anticlockwise rounds while the board was still wet .
As it looked quite harsh I took the piece of bathroom sponge, which I wetted quite often, and applied a lot of pressure while was smudging the ink pigment in outward direction (from the center to the edge). The smudging was repeated few times.
When everything was dried I took an acrylic block, a jet black Dovecraft pigment ink, a big clear stamp and stamped the flowers into two opposite corners.
I am totally ready for my drawing adventure now.
The end :)
Subscribe to:
Posts (Atom)